Total: $0.00
Taxes and shipping calculated at checkout

A week-by-week protocol for using infrared sauna therapy to clear mycotoxins, support recovery, and rebuild your health.
By Brian Wentzel | GoneGreenStore.com | Updated April 2026
Mold illness isn’t an allergy you sneeze through. When your body has been steeped in mycotoxins (the metabolic shrapnel of species like Stachybotrys, Aspergillus, Penicillium, and Fusarium), you’re no longer dealing with something water-soluble that politely exits in urine. You’re dealing with fat-soluble compounds that lodge in adipose tissue, brain tissue, and organs with high lipid content. Drinking more water and eating more fiber barely touches them. They were never going to leave on their own.
I learned this the way most of us do, the hard way. After years of undiagnosed exposure I had a body that was technically “normal” on every standard panel and a daily life that was anything but. Brain fog so thick I lost the ends of sentences. A kind of fatigue sleep didn’t answer. Joints that hurt in patterns I couldn’t explain. Infrared sauna therapy ended up being one of the most important tools in my recovery, not because heat is magic, but because it reaches a compartment of the body that almost nothing else can: the fat-stored toxins your liver and kidneys can’t fully process through ordinary elimination.
This article is the protocol I wish someone had handed me at the start. Mechanism first, then the practitioner landscape, then a phased schedule you can actually follow without crashing. If you want the broader science of infrared therapy itself, the cornerstone is here: the Complete Guide to Infrared Sauna Therapy. This piece is the protocol layer that sits on top of it.
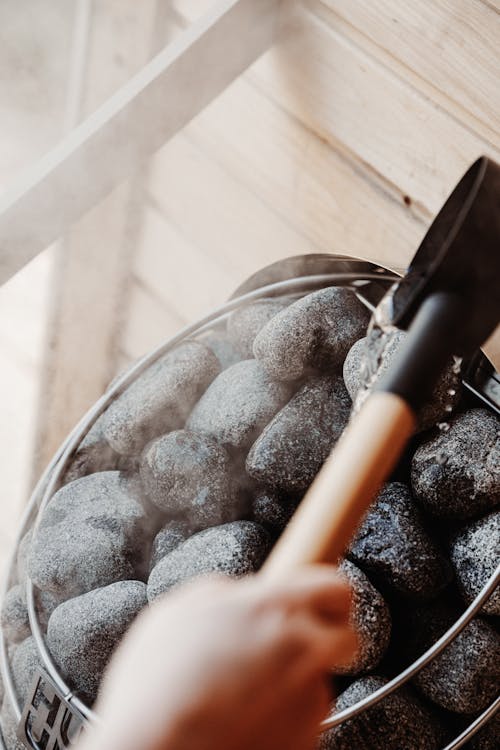
Far-infrared wavelengths penetrate roughly 1.5 to 4 centimeters into tissue. They aren’t heating the air around you and asking your skin to play catch up. They’re heating you from the inside, which is exactly the depth where fat-soluble mycotoxins are stored. That’s the difference between rinsing the outside of a jar and actually loosening what’s stuck to the walls.
What makes mold illness so unusual is that different mycotoxins damage different organ systems, which means the burden you’re carrying isn’t one problem. It’s several stacked on top of each other. Aflatoxins, produced by Aspergillus, are primarily hepatotoxic, and when they impair Phase I and Phase II detoxification in the liver, your capacity to process every other toxin you encounter drops with it. Ochratoxin A, also from Aspergillus and Penicillium, is nephrotoxic; it damages the kidneys and creates a bottleneck where you can mobilize toxins but can’t excrete them efficiently. Trichothecenes (including the satratoxin produced by the Stachybotrys species we’ve come to call “black mold”) are immunosuppressive, neurotoxic, and cytotoxic at vanishingly low concentrations, which is a large part of why mold-sick patients so often present with neurological symptoms (the brain fog, the word-finding lapses, the memory holes) alongside immune dysfunction. And gliotoxin, also from Aspergillus fumigatus, directly suppresses immunity by triggering apoptosis in white blood cells, which is why people carrying high gliotoxin levels often describe recurrent infections and slow-healing wounds long before anyone says the word “mold.”
Infrared therapy doesn’t target any one of these pathways exclusively. It works on several at once. Heat shock protein activation (HSP70 in particular) triggers cellular repair across tissue types. NRF2 pathway activation upregulates the body’s endogenous antioxidant production. Improved blood flow supports every elimination organ that’s downstream of the damage. And, yes, the direct mobilization of fat-stored mycotoxins begins the elimination process, provided you’ve given those mobilized compounds somewhere to go. That last part is what most articles skip, and it’s the reason people crash.
One of the more disorienting parts of mold recovery is that the people you’re trusting to guide you don’t entirely agree with each other. It’s worth understanding where the field actually stands rather than pretending there’s a single “official” protocol.
The majority of leading mold illness clinicians use infrared sauna as a core component of recovery. Dr. Dietrich Klinghardt, who essentially built modern environmental neurotoxicology, treats sauna as essential for deep tissue mobilization and pairs it carefully with binders before and after sessions to prevent recirculation. Dr. Joseph Brewer’s research at RealTime Labs documented mycotoxin excretion through sweat and made sauna a primary intervention in his protocol. Dr. Neil Nathan, author of Toxic, recommends sauna as part of a comprehensive detox plan but insists on opening drainage pathways before turning up the intensity. Dr. Jill Crista, author of Break the Mold, makes the same point with different emphasis: sauna mobilizes mycotoxins, but it’s binders and bile support that actually eliminate them. Dr. Ann Shippy includes sauna for patients who tolerate heat well and reinforces the same drainage-first principle. And Dr. Jess Peatross, whose biotoxin and parasite work has shaped how a generation of functional medicine patients think about detox, is the practitioner who coined the framing this whole article is built around: kill, bind, sweat. The names differ, the framing differs, but the practical recipe converges.
The honest exception is Dr. Ritchie Shoemaker, the researcher who defined CIRS and developed the VCS screening test, who has been notably more skeptical of sauna therapy than his colleagues. His concern centers on the magnitude of mycotoxin excretion through sweat. While some mycotoxins do appear in sweat, the quantities are trace compared to what the liver and kidneys process, and Shoemaker argues the primary benefit of sauna may be circulatory rather than excretory. That’s a reasonable critique, and worth addressing directly. Even if sweat-based mycotoxin excretion is modest (and the research from Genuis et al. that found BPA, phthalates, and heavy metals in sweat is much stronger than the mycotoxin-specific sweat data), the other mechanisms of infrared therapy don’t go away. HSP70 activation, NRF2 upregulation, improved lymphatic flow, mitochondrial support, and NLRP3 inflammasome modulation all contribute to recovery whether or not a given mycotoxin shows up in your sweat sample.
The framework that ended up making the most sense to me, and the one I’ll use for the rest of this article, is Dr. Jess Peatross’s kill, bind, sweat: heat mobilizes what’s stored, binders capture what’s mobilized, and your sweat, bile, and urine eliminate what’s captured. It’s the cleanest way to think about why sauna alone is never enough and why binders are the part most beginners skip. Sweat is one exit route. The real work happens in the gut, when mobilized toxins meet a binder.
If you take only one thing from this article, take this: never run a sauna session without binder support. The reason has nothing to do with sweat and everything to do with bile.
When infrared heat mobilizes mycotoxins out of fat tissue, those compounds enter your bloodstream and eventually reach the gut through bile excretion. In a healthy system, bile carries the toxins into the intestines and out the back door. The trouble is enterohepatic recirculation: your gut can reabsorb mobilized mycotoxins right back into the bloodstream, where they’re redeposited in tissue. Without a binder waiting in the intestines to capture them, you’ve effectively stirred sediment in a sealed container and made yourself feel terrible without actually reducing your toxic load. That’s the herx most people blame on “detox,” and a lot of it is recirculation, not elimination.
There are three workable approaches. The preferred option is pre-session: take your binder roughly 30 minutes before sauna so it has time to reach the intestines and establish a binding matrix before mobilized toxins arrive via bile. Post-session dosing (binder within 30 minutes after) works if pre-session use causes nausea or discomfort during the heat. The most thorough approach, and the one I’d recommend for higher-burden cases or anyone with a history of severe detox reactions, is bracketing: binder 30 minutes before and within 30 minutes after every session. It’s the closest you can get to making sure mobilized mycotoxins don’t re-enter circulation.
Not every binder captures every mycotoxin equally well, and the right choice depends on three things: what your test panel actually shows, how your gut tolerates the binder, and how much daily friction you’re willing to accept around dosing windows. The economics matter too, because some of these are $15 a bottle and some are closer to $100, and the price often tracks the convenience. A short tour of the ones with real evidence and a real track record:
Cholestyramine. The binder with the strongest clinical evidence for mycotoxin binding, particularly ochratoxin A. The Shoemaker protocol is built around it. Pick this one when you have a practitioner who’ll write the script and you want the binder with the deepest research base behind it. The catch is it’s aggressive in every direction: a rigid four-hour spacing window from food, supplements, and other medications; a tendency to constipate a gut that’s already struggling; and a brand-name version (Questran) loaded with sugar. The generic powder is sugar-free but tastes like sweetened chalk. Pricing is wildly variable. With insurance it can be a $5 to $10 copay; cash price for generic powder runs roughly $30 to $80 per month. Standard dose is 4 g twice daily, but starting at 1 g and titrating up is the gentler path. Not a starter binder.
Activated charcoal. The cheapest, most accessible, broadest-spectrum option. Pick this when you want a basic binder you can pick up tonight without a practitioner, or when you need an emergency dose after an acute exposure. Typical retail is $10 to $20 for a 100-capsule bottle, and dosing runs 500 mg to 1 g per session. The trade-off is that charcoal is indiscriminate. It will bind your supplements, your prescriptions, and most of your nutrients along with the mycotoxins, so you need a strict one-to-two-hour separation from anything else you swallow. It’s also constipating. Solid for occasional or acute use. Less practical as the daily backbone of a long protocol.
Bentonite clay. Moderate evidence specifically for aflatoxin binding, and gentler on the gut than charcoal. Pick this if your test panel skews aflatoxin-heavy or if charcoal makes you miserable. The modest mineral content (calcium, magnesium) partially offsets the depletion all binders cause over time, which is a small but real benefit on a long protocol. Roughly $15 to $30 per container. The one caution: heavy metal contamination is a real concern with cheaper brands, so buy from a source that publishes third-party testing for lead and arsenic. The same spacing rules apply but are slightly less strict than charcoal.
Zeolite (clinoptilolite). A cage-structure binder that traps both heavy metals and certain mycotoxins. Pick this when your HTMA shows elevated metals on top of mycotoxin exposure, because it’s the one binder that addresses both burdens in a single dose. Quality varies wildly here. Cheap zeolite is sometimes contaminated with the heavy metals you’re trying to remove, which is exactly the wrong outcome, so practitioner-grade brands like CytoDetox earn their price tag. Basic OTC zeolite runs $25 to $50 a bottle; clinical-grade liquid zeolite is closer to $80 to $120.
Takesumi Supreme (Supreme Nutrition). A bamboo-derived activated charcoal with a broader pore structure than standard charcoal. Pick this when you want an OTC binder that’s gentler on digestion than pharmaceutical charcoal but still gives you broad-spectrum coverage. This is one we’ve used in our own household, and it’s the binder we’d hand someone who’s brand-new to this and not yet working with a practitioner. Roughly $55 to $75 for 90 capsules, which is about a 30-day supply at typical dosing. Available without a prescription.
Biotoxin Binder (CellCore). This is the one most people end up loving once they’ve cycled through the basics. What sets it apart is exactly what every binder above it is missing: you can take Biotoxin Binder with food and alongside other supplements without the obsessive spacing windows that govern charcoal, clay, and cholestyramine. It’s gentle on the body, doesn’t tend to constipate, and stays effective deeper into a protocol when you need something more targeted than charcoal. The Carbon Technology base combined with wild-crafted herbs is designed specifically for biotoxin illness. CellCore is a practitioner-only line, so you’ll need a functional medicine order to access it. Pricing runs roughly $55 to $70 for a 120-capsule bottle, about a 30-day supply at 2 capsules twice daily. One caveat to be honest about: even with all that flexibility, you should still keep Biotoxin Binder a couple of hours away from prescription medications and antibiotics, and don’t stack it at the exact same dose as a traditional binder like charcoal or clay. Within those guardrails, it’s the most daily-livable binder we’ve used.
Carboxy (CellCore). Another CellCore practitioner-only product, focused on carbonic acid support and mycotoxin clearance. Pick this when you’ve plateaued on OTC binders and your practitioner wants to layer something on top of Biotoxin Binder for stubborn cases. Like Biotoxin Binder, it’s food- and supplement-compatible without the strict spacing of charcoal. Roughly $55 to $70 per bottle. Most useful as a stack-with than as a standalone.
One safety note that quietly determines whether a long protocol succeeds or fails: every binder depletes minerals over time. If you’re using binders regularly with sauna, you have to monitor mineral status. An HTMA test every 90 days is the floor, not the ceiling. You can’t purify aggressively without measuring what you’re depleting.
Before you mobilize anything, your body’s exit pathways need to be open. This principle comes straight from the practitioners who’ve watched patients crash from premature aggressive detox, and it’s the single most underrated step in mold recovery.
The liver does the chemistry. Phase I oxidation followed by Phase II conjugation is the route every fat-soluble toxin has to take to become water-soluble enough to leave. If Phase II is sluggish (which it almost always is in mold illness, between nutrient depletion and direct mycotoxin damage), mobilized toxins get stuck halfway through processing as intermediate metabolites that can be more harmful than the original compounds. Milk thistle, NAC, and adequate protein for amino acid conjugation are the standard supports.
Bile is the vehicle. It carries toxins from liver to gut, and if bile flow is slow, nothing else downstream works. Light-colored stools, gallbladder symptoms, or post-meal queasiness are signs to fix bile flow before you turn up sauna intensity. Ox bile, phosphatidylcholine, and bitter herbs all earn their place here.
Gut motility is where binders actually do their job. If you’re constipated, mobilized toxins linger in the gut longer than they should and reabsorption goes up. The honest minimum before starting sauna therapy is one well-formed bowel movement per day. Magnesium citrate, hydration, and fiber are the levers.
The lymphatic system is the freight network. Stagnant lymph means toxins pool instead of moving toward exits, which is why dry brushing, rebounding, walking, and deep breathing genuinely matter. They’re not optional spa accessories. And the kidneys handle urinary excretion; before any aggressive protocol, a basic metabolic panel is worth running to confirm kidney function is intact, with hydration as the main day to day support.
If you’re constipated, your bile is sluggish, or you’re not urinating much, fix those first. Mobilizing toxins without open exits is sediment in a sealed container. You just redistribute the problem.
This protocol assumes you have a working infrared sauna (we recommend the Therasage collection for its low-EMF, full-spectrum design), a binder routine in place, and a healthcare provider you can check in with about your particular case. If you’re severely ill, work with a practitioner before starting any detox protocol. This is where supervision pays for itself.
The principle that protects you across every phase is simple: low and slow. Compromised bodies have compromised detox pathways, and going too hard, too fast mobilizes more toxins than you can eliminate. The result is a toxin traffic jam, the kind of crash that sets people back weeks and convinces them sauna doesn’t work, when in reality the protocol just outran their drainage.
Goal: Acclimate to infrared heat. Establish binder timing. Open drainage pathways.
Goal: Increase thermal exposure. Deepen mobilization. Monitor response.
Goal: Full therapeutic dosing for deeper mycotoxin mobilization.
Goal: Sustain progress. Prevent re-accumulation. Support continued recovery.
One of the more powerful enhancements to a mold detox protocol is layering ozone therapy on top of infrared sauna. The TheraO3 module was designed to integrate directly with sauna sessions, and the synergy between the two modalities is real.
Ozone is an activated form of oxygen that, at appropriate doses, triggers a cascade of beneficial responses. During an infrared session with ozone running, three things happen at once. The first is NRF2 pathway activation: ozone exposure activates the master regulator of antioxidant production, which upregulates glutathione, superoxide dismutase, and catalase, the endogenous detox enzymes that do the actual chemistry on toxins infrared has just mobilized. The second is transdermal absorption: with pores open and skin blood flow elevated, ozone and its reactive intermediates can interact with subcutaneous tissue more effectively, creating a dual mobilization effect where infrared works on stored toxins while ozone supports their oxidative breakdown. The third is improved oxygenation, which matters because mold-sick patients often have compromised oxygen utilization at the cellular level. Better oxygenation means better mitochondrial function and more energy available for the work of recovery.
If you’re running TheraO3 with your Therasage sauna, the practical layering looks like this. Don’t introduce ozone until Phase 2. Your body needs the first two weeks just to acclimate to infrared. Start with 10 minutes of ozone during the first half of your session, then turn the module off and finish with infrared only. Build duration gradually as tolerated; by Phase 3 you can run ozone for the full session. And be careful with placement: the module should reach your body, but you should not be breathing concentrated ozone directly. Follow the manufacturer’s positioning instructions exactly. The deeper how-to lives in our companion piece, Home Ozone Therapy.
I want to be transparent about my own experience here, because a clean protocol guide is less useful than an honest one.
When I first started infrared therapy in my own recovery, I made the classic mistake. I was desperate to feel better, so I cranked the temperature and pushed through 40-minute sessions from day one. The result was a brutal crash: brain fog so thick I couldn’t form sentences, joint pain that felt like the flu, and the kind of emotional instability my family noticed before I did. That crash is what taught me drainage first, painfully. I backed off, spent two weeks supporting liver, bile flow, and gut motility, then restarted at the Foundation phase outlined above. The difference was night and day.
What ended up working was unglamorous and consistent: four sessions per week at moderate temperature (130 to 135°F), bracketed with binder support. I used activated charcoal pre-session and cholestyramine post-session, and the combination of mobilizing mycotoxins during sauna and capturing them with a pharmaceutical-grade binder afterward was the actual turning point. Adding ozone therapy with the TheraO3 in month two amplified the results noticeably. My energy improved faster than it had on infrared alone, and my retest showed more meaningful drops in ochratoxin A and gliotoxin levels than the previous round. Retesting at 90 days kept me motivated when symptom improvement was gradual and hard to feel day to day; objective lab data is its own kind of fuel.
The things I’d change are mostly about sequencing. I would have started binders one to two weeks before my first sauna session, not at the same time. I think starting them simultaneously contributed to that early crash. I would have tested earlier; I didn’t run HTMA until month three, which meant I was depleting minerals without knowing my starting point. (This is precisely why I now put Measure before Purify: test first, detox second.) And I would have invested in a full-spectrum unit sooner. I started with a far-infrared-only sauna and upgraded to the Therasage full-spectrum model later. The near-infrared component (mitochondrial support via photobiomodulation) and mid-infrared (deeper tissue penetration) added value I underestimated at the time.
If you’re dealing with mold illness or CIRS, infrared sauna therapy belongs on your radar as a core recovery tool, but only inside the larger framework. Protect first, by removing yourself from ongoing exposure. Measure next, by testing both toxicity and deficiency so you have a baseline. Then Purify (which is where this protocol lives). Then Restore what was depleted along the way. Each step earns the next one.
If you’re ready to start, the practical sequence looks like this. Step one, if you haven’t tested yet, start with a mycotoxin panel and HTMA combination from EquiLife Tests to establish your baseline. Step two, address the environment: rule out ongoing exposure with professional environmental testing through Got Mold? (use code GONEGREEN10 for 10% off), and download our Mold Free Home Guide for the complete remediation protocol. Step three, choose a sauna; the TheraPro from the Therasage collection is our recommended unit for mold recovery, and the optional TheraO3 module is what makes the ozone stacking above possible. Step four, follow the week-by-week protocol. Start slow. Use binders. Test and retest.
This article is part of our broader detox and recovery hub. For the complete science behind infrared sauna therapy, the cornerstone is the Complete Guide to Infrared Sauna Therapy.

